Installing baseboards is one of those little tasks where attention to fit and finish is important. A jigsaw can be used in a bind although the proper tool to use would be a miter saw but not everyone can afford those so, here we are...
The way to cut baseboard with a jigsaw can be as simple as marking the cutting line and making the cut. For doing the two different types of baseboard joints, however, there are a few things to keep in mind.
When it comes to installing baseboard, crown molding or trim, you generally have a choice between two joints. The miter joint is a simple joint to do if you have a jigsaw that can do bevel cuts. The coped joint is another joint you can make with a jigsaw and a coping saw – it takes a bit of time and skill, but the tight fit is well worth it.
The same goes for choosing a scarf joint over a simpler butt joint for extending the run of baseboard along the wall.
What You Need for Cutting Baseboard With A Jigsaw...
The first thing that you will need is the right jigsaw. A high-speed tool with a way to adjust the speed is always preferable for these kinds of tasks.
When cutting baseboard you really want a decent tooth count, somewhere between a 10 and 14 tooth count works pretty good. A decent general wood blade also works well and if you are installing pvc type of baseboard, then a metal blade will work as a cheaper alternative to the more expensive jigsaw blades specifically made for pvc.
TIP!
If you are cutting into baseboard with the finish side up, you may find a reverse teeth finish blade useful for doing a cleaner cut with less finishing work to do later.
Measuring And Marking: A tape measure, pencil or pen and a speed square are additional tools you will need to make accurate and square cuts and are really "essential" type of items anyways.
Coping Saw: You could use a coping saw for making the coped corner cuts but it is not really necessary if you tilt the jigsaw on it's side and achieving the same results (if your patient).
You’d need a tape measure and a pencil for marking out your cutting lines. If you are doing cope joints using baseboards, a coping saw is simply the best way to make sure that the decorative curves fit snugly inside the corners.
Making Straight and Miter Cuts on Baseboard With A Jigsaw
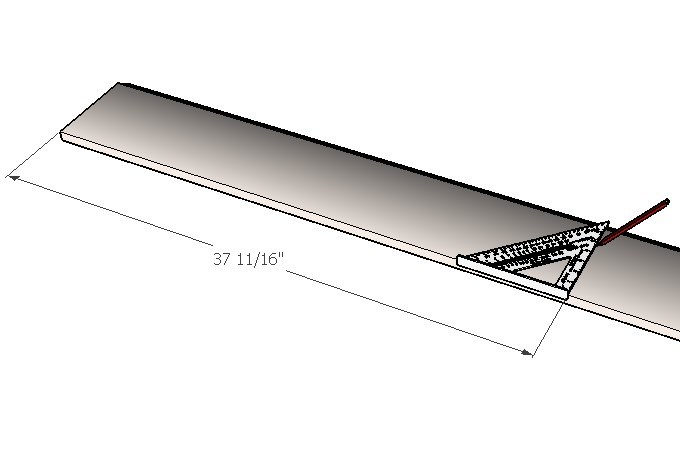
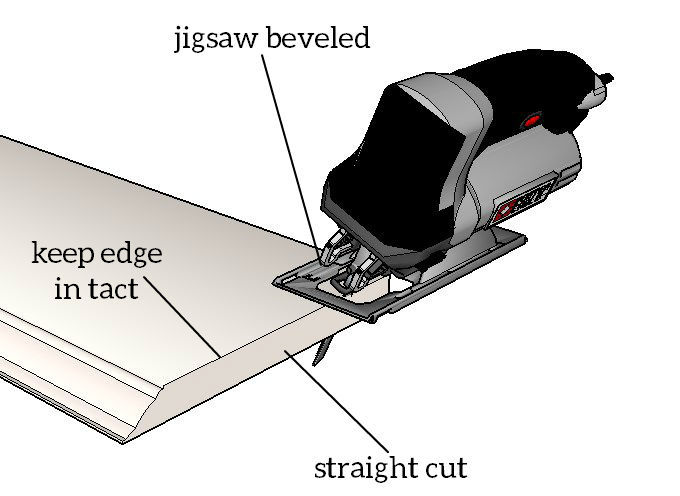
To cut baseboard to length, simply measure from one end to the point of the cut with a tape measure, and mark the point with a pencil. Use a speed square or T-square to mark the cutting line.
TIP!
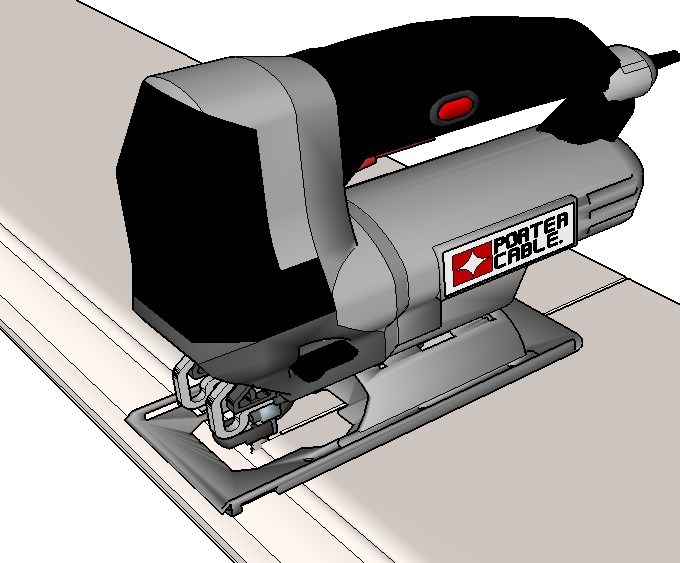
If you’re making a miter cut, first unlock the shoe of the jigsaw and set it to the desired angle (usually 45 degrees). Lock the shoe in place, and check that the angle of the blade against the shoe has been set accurately. You can do this with a speed square for 30-degree or 45-degree miter cuts.
Then take the jigsaw, with the right blade installed, and position it such that the blade is on the waste side of the cutting line and the shoe is flat on the workpiece. Make sure that the workpiece is clamped or otherwise secured, with enough clearance off the bench or the floor for the jigsaw blade.
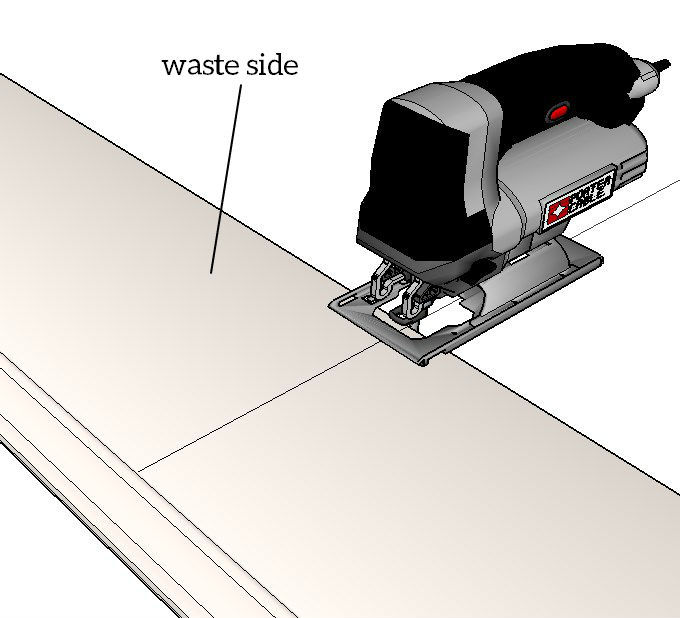
Turn on the jigsaw and wait for it to get up to speed, and gently ease the blade into the baseboard. Steadily guide the jigsaw until you finish the cut. You can also use a speed square to guide the shoe as you cut for straighter cuts. Just make sure the speed square is secure and won't move during the cut.
TIP!
Straight 90-degree cuts can be used for cutting baseboard to length, or for starting one side of a coping joint for an inside corner of the room. Miter cuts are used for quickly preparing baseboard for inside corners, and for outside corners as well.
TIP!
Most jigsaw blades cut on the upstroke, so some trim professionals prefer to cut from the backside instead. If you prefer to cut with the finish side facing up, you may opt for reverse teeth finishing jigsaw blades instead of regular ones.
How to Make a Coped Corner Joint With a Jigsaw
The coped corner is a good deal harder to make than a simple miter corner, but they are worth it for a seamless looking fit. Even when the joint opens up as the baseboard wood shrinks, as it inevitably does, the opening is disguised by the extra material used in the joint.
Half of a coped corner is a baseboard that’s been cut to fit flat against the wall with no bevel, which is easy enough to do with a jigsaw or even a circular saw.
The overlapping half of the coped corner is first made by cutting the baseboard to length, preferably with a bevel cut that exposes the grain end of the baseboard. This gives the jigsaw or coping saw more material to work with.
TIP!
You can also make a flush cut (90 degree) and use a back cut, as illustrated below but it will be a little bit harder when performing the backcut as opposed to having a 45 degree angle on the end.
Then, carefully make a back-cut with the jigsaw while following the decorative curve of the baseboard. To do this, first secure the workpiece with a clamp on a stable bench. Then aim the jigsaw at a 45-degree angle inwards into the back of the baseboard, and make a curved cut that follows the surface.
backcut with 90 degree cut on end of baseboard
Finish the edges sandpaper or files, and check the fit against the order half of the corner. Adjust as needed until the socket formed by the back cut fits snugly against the face of the other piece of baseboard. Install and secure in place with baseboard nails and glue, then apply caulking and paint as needed.
How to Make a Scarf Joint With a Jigsaw
Like the coped corner, the scarf joint is the preferred way to join two pieces of baseboard to extend the run. Even if the joint opens up, as they inevitably do, the seam is still mostly invisible to a guest looking at it straight on.
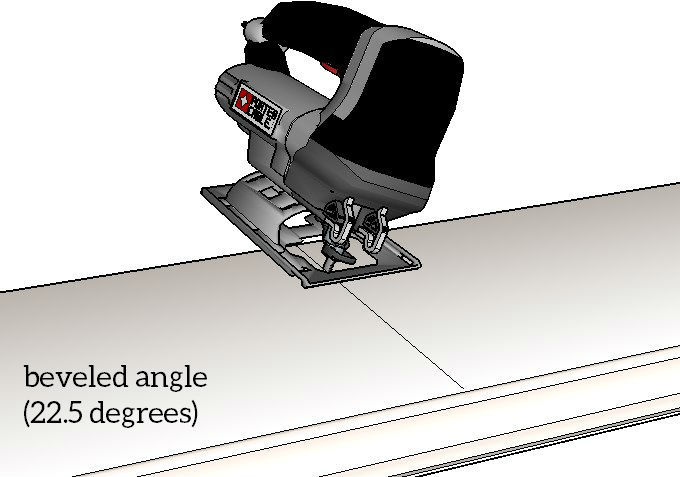
To make a scarf joint, make two opposite bevel cuts on the two pieces of baseboard to be joined together. It helps if you can plan ahead so the joint overlaps on a wall stud, where the two sides can be nailed into place for added stability.
TIP!
These joints are usually just a 22.5 (or 45) degree cut in opposite directions that meet up to form a tighter, cleaner joint. These are cut with the jigsaw's shoe set at the appropriate angle.
Install the baseboard into place with glue and finishing nails. Add caulking along the seams and allow the joint to set. After that, you can finish the baseboard joint with paint as needed.

